


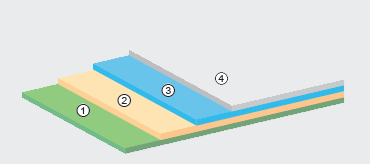
Green

Orange

Grey

Black
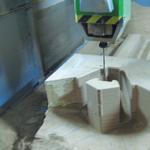
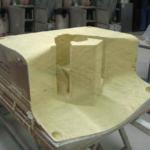
Model Preparation
Prepare master 3D pattern of the composite part in CNC machine or 3D printer.
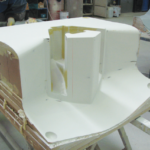
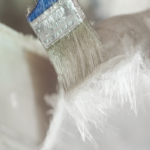
Preparation of Model Surface
Apply putty, primer and topcoat on master pattern surface.
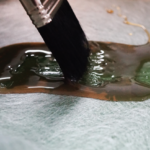
Mold Release Agent Application
Apply Polivaks N and Polivaks SIVI PVA liquid mold release agent on master pattern.

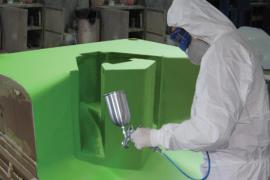
Mold Gelcoat Application
Apply tooling gelcoat Polijel 280/Polijel 220 on master pattern in two layers.
Skincoat Application
Apply Polives 701-TA with glass surface veil or 225gr/m² CSM* after gelcoat.
Polyester Application
Apply Polipol 321-ZERO wet on wet with glass fibers on skin coat. It is possible to apply 6 layers of 300 gr/m² CSM* or 4 layers or 450 gr/m² CSM* of glass fibers wet on wet. After exothermic reaction, wait for the lamination to cool down and continue until the desired thickness.
Demolding
Wait 24 hours for the mold to cure on master pattern and install a frame in order to add structural stability. It is possible to demold after framing the mold.
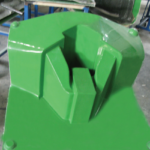
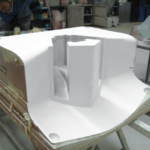
Prepare Mold for Production
Clean the mold and polish to obtain shiny appearance.


Modification Description
- FR Filled flame retardant
- D* Filled (*with filler content)
- T
 Thixotropic (no sagging)
- A Cobalt preaccelerated
- ABP Amine preaccelerated
- UV UV Curing
- L UV light stabilized
- I Lower viscosity
- V Higher viscosity
- LSE LSE (low styrene emission)
- H* Gel time customized (at room
temperature) * minutes
 H40 Optimized for summer season.
Gel
time (at room temperature) 40 minutes.
H40 Optimized for summer season.
Gel
time (at room temperature) 40 minutes. H20 Optimized for winter season.
Gel
time (at room temperature) 20 minutes.
H20 Optimized for winter season.
Gel
time (at room temperature) 20 minutes.- COLOR White or custom color options
Gelcoat Customizations
Polijel gelcoat table descriptions and modifications.
- Spray
Application (airless preferred)
- Brush or Roller
Application
- Color Option:
White colored
- Color
Option: Light colored (pastel)
- Color Option:
PRO
colored
Production Quantity Depending on Process (parts/year)
Regardless of product dimension and complexity..
")
